29 March 2011

Progress at last.

At last, the Inghamish box seems to be coming together. Yesterday, I managed to fit all the top pieces of ebony to the lid and managed to shoot in the mitres with some accuracy. There pic shows the box after I went over it with the first provisional sanding using 180g Abranet...I found that sanding with ordinary papers were clogging the grain too much.

There's a little bit of tear out in the top corner closest to the camera, but my feeling is that with further sanding using finer grits, this ought to disappear eventually.


The second pic shows the underside. I made this from a couple of bits of bookmatched veneer, with the balancer on the inside being rock maple. Fitting it to the curved rebate was an interesting little exercise in itself. The end grain corner posts will eventually be hidden by the feet and for this I intend to keep it simple and use four pieces of 25mm square brass, screwed in place.

The next job will be to separate the lid from the box and then fit more ebony to bring the total thickness of the centre section up to 12mm...it'll also cover the end grain again of the corner posts.

The small item that's started to impinge on the grey matter though, is the handle and I don't really know how I'm going to do that. I dare say though, it'll get sorted...somehow.

27 March 2011

Quartet, the deux

The last of the Japanese chisels have now been done and as predicted, they did take a bit longer than the dovetail chisels. The big 36mm chisel had a fairly large 'bump' just behind the cutting edge which took several hours using the 100micron 3M films to remove...it's not all out yet, but close enough for all practical purposes. As the backs are polished through the normal honing process, they'll get progressively better. The hoops were set using the excellent instructions on the 'Tools for Working Wood' site where that a hammer is recommended to compress the fibres, except I didn't use one...I used a metalwork vice instead. Much quicker and a lot more accurate!

Amongst all the excitement of hours of chisel back flattening over the last couple of weeks, I've not forgotten the Inghamish box. This pic shows that the lid has been glued in place and the rebate cut round the outside...a fairly tricky time with the router, but which went according to plan. The first section of the inlay has been glued in place, with the corners having been mitred. The next three edges are then repeated, after which it'll be time to saw the lid off.

Fun times indeed!

22 March 2011

Quartet

The weekend's activities centred around preparing the new chisels, dealing firstly with the dovetail chisels. Every Japanese chisel is unique, so it took a little while to work out how to fit each one into the Kell III honing guide as the wedges that I'd made for other chisels weren't suitable.

The reason for this is that the apex of these dovetail chisels is a sharp ridge (think of them as having an almost triangular cross-section) so that when the wedge is pushed tight against it, I found that the rosewood was splitting (one just has to have upmarket material for the wedges, doncha know) The way I found to circumvent the problem was to glue on a very thin layer of multiply to the underside of wedge where it touches the chisel...problem solved!


Fixing the English Walnut to the ends of the handles went without a hitch as well, so now I've got a really good set of dovetail chisels.

Now for Mr F's Oire-Nomis, which are probably going to take a little longer...

19 March 2011

Safe

Having just obtained some more rather expensive Japanese chisels, I've just spent today making a bespoke rack for them. If the pic is clicked on you'll see that each one has it's own separate little compartment, using some 6mm ply as a divider, though they've yet to be prepared for use.

You'll also note that the rack has been mounted fairly low down, just above the bench well, making it easy to extract the right chisel when it's needed. Previous versions of this type of rack that I've made have been open (with no clear plastic cover.)

So...you reach into the tool well to get something, grab hold and lift...

...and your hand goes straight across the blade of a razor sharp chisel! Believe it or not, I've caused considerable leakage on more than one occasion in just this way.

On a similar note, I'm always astounded when I see pics on t'interweb of chisels and other nasty, sharp tools racked out so that the slightest lapse when reaching for one means that there's a fair to middling chance of impalement...

...and perhaps the worst example of all is when chisels are racked out edge upwards, which I've seen more than once!

16 March 2011

Smart

Getting in from work last night, I found a couple of boxes stacked on the dining room table, one from Axminster and the other from Matt at Workshop Heaven. Both contained the chisels I'd ordered at the weekend, in addition to a selection of 3M films, including some 60micron sheets that Matt had stuffed in the box...free and gratis! This coming weekend will no doubt see me preparing these chisels, so the 100 and 60 micron films are going to come in for some sustained use.

However....I'm expecting one more parcel.

I've made several small boxes over the last couple of years, and without a shadow of a doubt, the worst part is the hinging, a process guaranteed to increase both stress and blood pressure levels, both of which I need like a hole in the proverbial. I'd been dreading this part of the job and had resigned myself to using Brusso hinges, which althouth excellent quality, are fiddly and just plain bloody awkward to fit.

In a very timely fashion though, Andrew Crawford has brought out his smartHinge, which by all accounts are dead easy to fit, needing only an 8mm bit fitted into a router table and will be well worth the exorbitant price if they can save my BP rocketing up! With any luck, fingers crossed, there'll be a third parcel on the doormat when I get in tonight.

14 March 2011

Spanked

The very recent and terrible disaster in Japan over the last couple of days has caused me a bit of a dilemma. I've gradually been collecting a series of Japanese dovetail chisels and fully intended, in the next few months to also get a few of the in-between sizes of Mr F's most excellent Oire-Nomis' from Workshop Heaven.

However, the situation in Japan might mean that the supply of tools to the UK may suffer some disruption, probably for a considerable time to come, so that once stock held by Axminster and the like has gone, there may not be any replacements for a quite a while.

In conversation over coffee, SWIMBO asked me yesterday if there were any chisels that I needed (bearing in mind the situation) and being of sound disposition, I felt it possibly a little churlish to refuse the offer.

...so her credit card got a bit spanked!

I now have a further seven chisels coming in the post...and I do like parcels!

13 March 2011

Scary...

I was approaching this part of the Inghamish box with a small amount of trepidation (and that's stating the case lightly)

What you may well ask?.. setting in the top!

Normally, this is fairly straightforward...make the rebate and shute in the top taking some care in the process.

Here though, the top has been fitted into the rebate dry (so that it's a tight fit) and then the grooves for the inlay have been routed in situ, using the sides of the box as a reference for the router fence.

This, believe it or not, was a fairly brown trouser exercise as the slightest slip up with the router would have mangled the burr elm. I had to do it this way (ie, not taking the lid out and machining separately) as I needed to get the inlaid grooves parallel with the sides of the box and not the sides of the plywood top, if you follow. However, as you can see from the first pic, it all went to plan without a hitch...more's the wonder!

The rebate round the outside is going to be filled with an ebony banding mitred at the corners, not least because otherwise the end grain of the four corner posts is going to show on the finished box.

All that remained to do was to extract the top, flip it over and route the grooves in the underside to match up with the sides...simple enough and not quite so critical.

The base has also been routed in and that also went smoothly, so the whole thing is coming together quite well.

09 March 2011

Drastic measures...

Having spent much time pondering over the merits of various dovetail chisels, I finally opted for the Umeki-Nomi's from Axminster. These are decent Japanese chisels, hardened to around RC66 (so pretty hard) with a nice White Oak handle and finely ground down the long sides, but...

...the hoops make them almost useless for hand work (at least for me) The reason is twofold, firsly when used in the horizontal mode for any length, I'm left with a nasty red weal in the centre of my palm. Secondly, if used verticaly, the sharp edge of the hoop gets trapped on the inner part of my thumb near the crease and is generally intensely uncomfortable.

So I decided to do something about it...I cut the hoop off!

This seems a bit drastic but it's not really as I dowled on a length of 30mm English Walnut. A little shaping with the LN Block (and it's new o1 Quangsheng blade, of which more later) and sandpaper has now provided me with a slightly overlong handle (which ought to give a little more control) and a rather natty two tone handle.

The blade has been honed to a single bevel of 25deg so there's no way it's ever going to be tapped with a maul or even a Japanese hammer.

So... not too shabby, n'est pas?

05 March 2011

Slippage

Whilst goofing around the other day on t'interweb, I came across an interesting little snippet on the GMC site, which entailed cutting 'slip joints.' I've never heard of these before, but they are large, skinny bridle joints, suitable for the back panel of a cabinet, for example. This types of joint was much beloved by the late JK and he used them in all or most of the stuff he made.

I've cut these types of joints before by hand and although not difficult, they do take a measure of concentration to get just right, and often need to be adjusted for a decent fit with a shoulder plane or the judicious use of a wide chisel.

I copy/pasted the information from the site for a 10 point instruction doc:

1. You will need to make a pair of thin shims, the same thickness as the kerf, cut by the bandsaw blade. In my case the thickness was 1.2mm and I cut out a piece of mounting card for the shims. Do not worry too much about measuring this accurately, when you make a trial slip joint you may find you need a slightly thinner or thicker shim to make the finished result tighter or looser.

2. The peg in a slip joint does the same job as the tenon in a mortise and tenon joint and a pair of thick shims (6mm) are used to set the thickness and position of the peg. I recommend making the peg one third of the thickness of the wood. For this, each of the thick shims must be one third of the wood's thickness. I used 6mm MDF to match the 18mm oak.

3. Unlike hand cut joints which rely on accurate marking, slip joints are largely self-aligning once everything is set up. The only mark required is the depth of the joint which you gauge by laying the end of one piece of wood on the edge of the other, then run a pencil line against It.

4. The band saw fence is clamped and positioned with one thin shim plus the wood thickness away from the blade. I use a home made fence for this kind of work because It is more rigid.

5. Place one thick shim against the fence to position the wood for sawing the outside of the peg. Feed the wood slowly into the blade as far as the pencil marked depth

6. Place two thick shims plus two thin shims against the fence to position the wood for sawing the inside of the peg.

7. Place one thick shim plus one thin shim against the fence to position the wood for sawing outside of the socket.

8. Place two thick shims plus one thin shim against the fence to position the wood for sawing the inside of the socket.

9. You now have four slots or kerfs, carefully spaced so the inside of one pair matches the position of the outside of the other pair.

10. The two halves of the join tare now ready to slip together. Ideally, this will be a firm fit with even contact all over the peg and socket sides. If the fit is too tight, the joint will be forced apart. The solution is to Increase the thickness of the thin shims. If It is too loose, these shims need to be made thinner. Brush glue inside the socket, that way any surplus will be pushed Into the joint as you close It. rather than getting scraped on the outside.

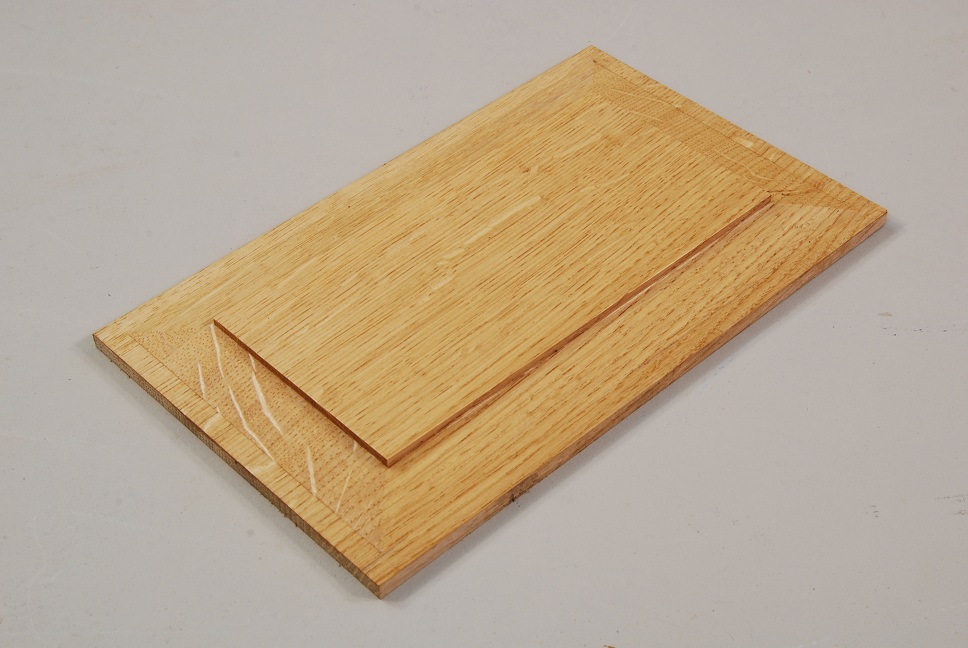
I've been playing around with this technique today and found that with a little experimentation, a perfect bridle joint could be cut on the bandsaw in about 2 minutes, taking about a minute or so to get the correct thin shims made up. In my particular case, it happened to be a couple of pieces of picture framing card which were just about perfect.

01 March 2011

Rock and a hard place.


I made the small panel last weekend and whilst easy enough, in theory, practise was a little different. I started by using the plough plane to form a rebate all the way round. This was to leave a flat that was 6mm thick (to slot into the frame groove) and around 8mm wide.


I then made four grooves to establish the raised section of the panel, leaving the section in the middle to be removed with the Veritas rebate plane. Some cunning measurement enabled me make the beveled shoulder just a fraction wider than the plane blade. An added bonus was that the adjustment screws on the side of the plane allow the blade to be shunted over a fraction so that it's dead flush with the sides, so that the chances of a 'dig in' are reduced to almost zero.


Once it was done, I made a dedicated sanding block to finaly smooth the bevel though very little work was needed...to all intent and purposes, the finish was left straight from the edge.


The finished panel is shown in the last pic and it turned out quite well, but it took a lot of concentrated effort to make all the bevel mitres line up. What was especially hard was to make the seemless transitition between the bevel and flat...very hard to do without taking off the odd slither of material where it shouldn't be taken!

Not something I want to do again in a hurry, but if a small 'one-off' panel is needed and a router cutter is just too big for the job, you're really 'twixt a rock and a hard place...this is the only way to do it!