26 June 2013

Going to the dogs!


These things horrify me...I can thing of nothing worse to hold a bit of wood securely on the bench top...sooner or later, you're bound to run the front of a very expensive plane into the top of them, with much mutterings of "tsk, tsk...look what silly old me has done now" or, in my case, something a little more profound and in the best traditions of Aglo-Saxon verbosity which would make Gordon Ramsey...

...sound like a pussy cat!

However, a couple of years ago,  I went to a woodworking 'doo'... in fact I'm going again next month as it's rather a good event and well worth attending... but I digress.  Whilst there, I happened to notice that there were plenty of round bench dogs which were conveniently 19mm in diameter (a common dowel size) that were kept in place in the said bench 'ole with a simple, if cunning little device...a ball catch.
I thought at the time that this was a stroke of genius and proceeded to make some (above) when I got back to the 'shop.

There is one, ever so slight Spaniard in the soup and that is...they don't work very well.  The bloody things keep on slipping down so there I am,  planing a bit of nice stuff and after a few passes, the front dog drops so that with the next pass of the plane, the timber rockets forward and me with it.

Nnnnnnnng......infuriating!


I decided to go back to my original Krenov style wooden ones and made a pair from an oddment of ash and walnut. The construction is pretty straight forward, but takes a little bit of fiddling to get 'just right' in the bench holes.  Essentially, there's a little taper worked at one end which throws the walnut away from the stem and it's kept in that position by a small spring purloined from a biro (another nice JK touch) so that in use...


...the bench dog will stay wherever it's positioned without slippage.  Easy to make and a vast improvement on those hideous metal things!

16 June 2013

Uplifting

Frequent perusers of this Blog will have realised some time ago that in some areas I'm just a tad parsimonious, having pockets that tend to be on the shallow side.  In this fiscally stretched time I suspect that many of us are in same bateau, so killing two oiseaus's with one pebble seemed like a good idea...or so I thought.

I'm referring here to my big T11 router, which is permanently set up in a table.  One of the features of this machine is that it has a 'through the table' height adjuster...a very desirable feature for a table router.

Except that it doesn't work very well.  I was hoping that a little twiddle with a suitable twiddly tool would raise and lower the machine smoooooooothly and accurately.  In actual fact it doesn't...the machine lurches reluctantly up and down in small increments as the adjuster's turned...even the application of a squirt of dry lube doesn't make any noticeable difference.

It's so bad, that as the router bit goes up and down it moves a few degrees away from the vertical!

Whilst there's nothing wrong with the router, the 'upy and downy' mechanism is about as useful as a chocolate bloody teapot, so I've decided that the recent acquisition of fundage from F&C will enable me to splash out on a state-of-the-art router raiser, which ought (fingers crossed) to be a vast improvement.

At the same time, there's been an issue in the 'shop that I ought to have dealt with, but haven't...timber moisture content (MC).  When I make stuff, I generally use air dried timber (if I can get hold of it) which ought to have a finished MC of around 20%...too high really, for use in a centrally heated house. My regime has been to cut material oversize and then to further condition it 'in-stick' in the 'shop for another period of time...anything up to six months, when hopefully the MC will have dropped to around sub-10% but I've had no way of checking it.

As the 'shop is now quite warm and permanently de-humidified (a machine runs 365/24/7) it doesn't take too long for the MC to drop but I'm still never quite sure how dry the timber is...until now.  That's because I've also order a moisture meter which ought to take the guess work out of deciding just when the right time is to start on a new project.

Unfortunately, both these items are out of stock of the moment.

Bugger!

11 June 2013

The Trilogy of Three


In between finishing off the Japanese Floor Lamp, I've been furtively delving in my various oddment boxes, recently detailed here abouts. In doing so I came across one or two offcuts that might be worthy of a little box of some sort, the first piece being a very undistinguished lump of Brazilian Walnut or Ipe.  There wasn't much there, but just enough to make this small box, shown with a 50p for a size comparison.    


Have seen that this one turned out quite nicely, I had a further delve into a special drawer with only English Walnut offcuts and came across a really scabby bit, full of cracks and splits but with a little experimentation...


...there was just enough to make a book matched lid, with an almost 'mother of pearl' iridescent sheen to the lid.  When finished, this one was sent up to Carlisle, in the north of England for my daughter's twenty-something birthday present.

With enough space on a particular unit for one more little box, I remembered a piece of Bocote that had been given to me by Marahisa Fujiyasu-san, the Japanese swordsmith, when we visited him last May.

It was badly cracked and difficult to see what material could be gained from it, but with a ...


...lot of thought and some very careful cutting, this box was made.

Now I know what you're wondering.  A trilogy is usually three of something...'The Three Musketeers' springs to mind, but if you're a fan of Douglas Adams, that rule doesn't necessarily apply...

05 June 2013

The Japanese Lamp


The lamp has finally been finished with the overall view shown above...


...and the box to give some visual 'weight' to the bottom.


The wooden 'cats cradle' at the top is shown here.

All in all a nice little project and one that didn't tax the little grey cells too much, although it must be said that the Festool Domino made the project about 300% easier than it might have otherwise been...

29 May 2013

Shoji stuff


Shoji panels simply consist of sticking a translucent paper to a frame...very, very easy to do and just about the quickest process in the whole of the lamp built.  Begin by making the frames which is fiddly as the material is 7x7mm, but if a 2.5mm wing cutter is used in the router table, the mortise for the bridle becomes easy enough to make, whilst the tenon is made using a straight forward parallel cutter.  The benefit of making them using the router table is that once complete, the frames will be flat and out of 'wind'.

The frames are finished with a couple of coats of Liberon Oil, then waxed, but it's crucial that the underside where the rice glue is applied is sanded clean afterwards.  Cut off a piece of paper well oversize and...


...tape it to the bench, 'show' side down, with the clean underside of the panel uppermost.


Apply the rice glue with the special adaptor on the bottle.  This ensures that an even bead is applied along the centre of the wood, then simple role the paper onto the frame and press down.


All the panels were done in exactly the same way and then left in a stack...


...between a couple of boards to dry overnight.  A little gratuitous plane gloatage adds some weight on top....


...after which the panels are sprayed with ordinary tap water and left for a couple of hours to dry.


 This has the effect of shrinking the paper and pulling it 'drum' tight.  Trim off the excess with a scalpel...job done!

23 May 2013

The 'Goldilocks' Syndrome...Deux

 A little more's been done on the Japanese lamp, namely the internal lamp fittings which have been made in 6mm acrylic (Perspex).  The reason for doing it this way is that any shadows cast by the lamp will be kept to a minimum.  This stuff is easy to work but doesn't like edge tools so a disc or belt sander is the best thing I've found for smoothing edges...then finish with a bit or sandpaper and a cork block.  The fitting consists of two 'L' shaped pieces with a bridge across the middle with all three bits being bolted together with 4mm nuts and bolts.

Firstly, assemble all the bits and pieces that are needed.  A bending jig (left) and a heating mask (right) with cramps set to the right opening, together with a chinagraph pencil (excellent for marking plastic).


A better shot is shown below of the heating template.  A standard hot air gun (paint stripper sort of thing) is best to apply localised heat from underneath...

...so that once the plastic has come up to about 140degF it goes straight into the bending jig.


If it's too hot, the acrylic will start to bubble (bad) and if it's too cold it will crack (even badder) when it's bent, so a little practice enabled me to find the 'Goldilocks' temperature when it was just right.


Once everything had cooled down and had been cleaned up, drilling the holes for the nuts and bolts was easy...no more than a couple of hours work all told for the whole exercise.

Shoji panels next...

21 May 2013

A Question?

Naturally enough, I like wood...and for anyone who does a lot of work with the stuff, who doesn't?  What I don't like...in fact I detest it, is throwing the stuff away, so I've developed a few devious strategies to organise the storage of 'the good stuff'.  The first pic shows the bigger boards stacked on end and held in place with a couple of cords tightened with camping guy ropes...having a big lump fall out (and it has happened, frequently) and also where it unfailingly seems to launch itself at your head is guaranteed to cause some sucking of the teeth together with some very rapid foot shuffling. 

Some nice boards in there though...English Walnut (the big one near the ceiling) together with American Cherry, lots of Elm, Teak and English Oak.


During my time with the MOD, I acquired several very handy, large storage crates, on of which is shown above for my collection of short, fat bits and another is shown below...


...which contains all the bigger bits of 'exotics' that accumulate.  African Blackwood, Teak, Indian Ebony, Cuban Mahogany, Purpleheart and one or two bits of Aussie burr timbers all live in here.  


Yet another box stores all my oddments of 'crap'...bits of mdf, small oddments of ply, which are useful at some point during a making process.


Anything too small for the green boxes lives in a drawer under the bench.  Stuff in here is usually small, maybe a bit longish and often a bit skinny, but always useful for all sorts of little jobs.


Under the sharpening table is a rack with all the fatter, shorter lumps that won't go anywhere else...Greenheart, Indian Ebony, a bit of Ash and one or two pieces of Mahogany.  Another rack...


...is positioned under the pillar drill, this time specifically for bits of Elm.


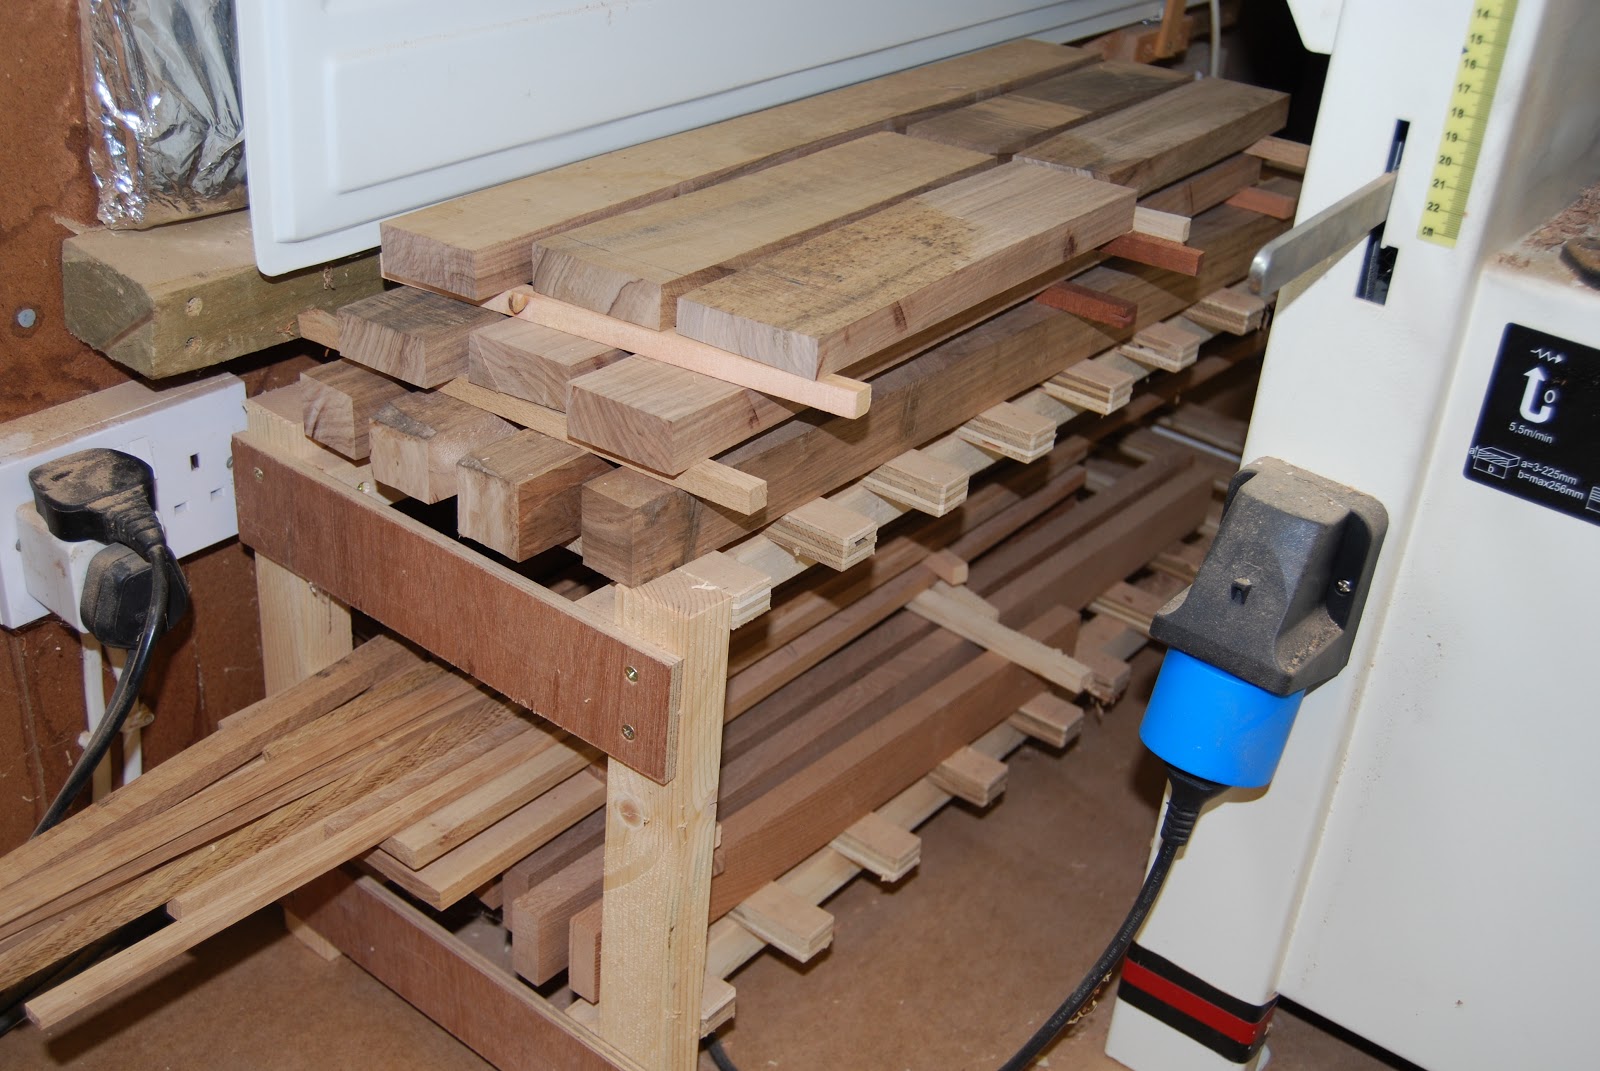
Storage for timber that's been roughly cut to condition is on yet another rack, just under the oil filled rad so there's a reasonable amount of heat there when it's on.  Shown on this rack are bits of English Walnut (top) recently cut for the new stand on the Double Square Cabinet, a large bundle of long thin bits of Oak for shoji lamp panels and one or two bits of Elm (bottom) which might form the basis of a cabinet later on.

Once the timber has been on this rack for anything up to six months, or even more, it's moved... 

...to another rack under the take-off table ready for use, as this will be the next project to be made.  Shown here is a pile of English Oak for a wall hung cabinet with a thick board at the bottom which will be a curved door.


A puzzle...and one that I've never been able to solve. 

 The answer isn't 42!

But it might be......